Installing Kali Linux on Raspberry Pi3

Installing Kali Linux 2.0 on a Raspberry Pi 3 is a straight forward task. If you have installed Kali on a Pi 1 or 2 the steps are the same.
Things Needed:
- Raspberry Pi 3
- Power Supply
- HDMI cable
- 8-32 GB SD-Card
- Keyboard and mouse for controls
Step-by-Step How To Install Kali Linux 2.0 to a Raspberry Pi 3
1. The first step is to download the Kali Linux 2.0 Image file for the Raspberry Pi 3.
- The download page is here. https://www.offensive-security.com/kali-linux-arm-images/
- There are other Image files so scroll down to the Raspberry Pi 2/3 download.
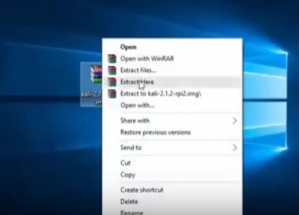
2. After the Image file is downloaded it will need to be extracted. Most computers will not have the right software to extract it.
3. After the Image is extracted it is ready to be written to a SD-Card.
- Win32Disk Imager is a popular free disk writing software that can be used if you dont already have one.
- Link to Win32DiskImager https://sourceforge.net/projects/win32diskimager/files/Archive/
- Load the Image file into Win32Disk Imager and write to the correct drive.
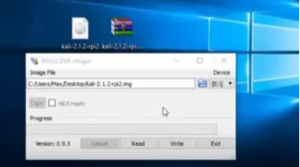
- Be sure to have the correct drive selected as it will overwrite any drive that is selected!!
- It will take a few minutes to write the package and then say Write Successful when its done.
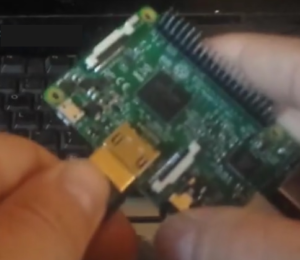
4. Once the Image is written to the SD-Card it is ready to install into the Pi 3.
5. Everything can now be plugged into a monitor or TV with a HDMI cable
- An old keyboard and mouse can be used as a controller.
- After powering up the Pi 3 it will go through a boot up process. The screen will go blank a few times which is normal.
- A login prompt will come up. Username: root Password: toor
- At this point you should have Kali Linux installed on the Pi 3.
Summary
The above steps are to get Kali 2.0 basic install on a Pi 3.
After installing Kali on the Pi there will not be many tools by default and they will need to be installed.
This process is sourced from the website of WirelessHack.org purely for reference purpose.
0 Comments